标签归档:prestashop

prestashop 安装


STEP 1:  下载prestashop安装包

你可以从google code下载到最新的版本 http://code.google.com/p/prestasho/downloads/list

或者prestashop 官方  http://www.prestashop.com/en/developers-versions


STEP 2:  解压安装文件上传到空间

你可以在本地解压,如果空间支持解压文件,可通过工具上传到空间后解压。


STEP 3: 建立数据库

登录空间的数据库管理界面 phpmyadmin 新建一个数据库 例如 prestashop_150 留着安装时使用


STEP 4:按步骤安装

通过域名访问,会弹出安装界面,然后按照要求一步步配置安装。

安装过程中如果遇到目录权限不够,直接通过ftp工具修改对应的目录权限为  755 (遍历到 子目录和 文件);

配置数据库名称时写上之前创建的备用数据库名称;

到安装最后成功时 需要修改admin目录名称,这是prestashop的安全机制。

删除install目录,如果install目录还想留着 建议将此目录改名  例如 edintalled.

到此基础安装ok。然后prestashop网站就可以通过域名访问了。


prestashop 后台记录分页数设置

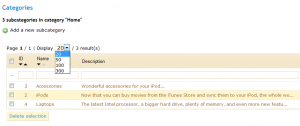
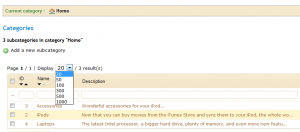
使用prestashop时,后台每个显示数据的地方都有个分页的下拉框,数据量小时感觉不到这个下拉框有什么问题,但是当你的数据量大了,你可能会希望一页显示的数据记录条数不局限于 20 50 100 300。 那这个有办法实现吗?答案是肯定的。只需要修改一段代码。

打开 classes/AdminTab.php

查找到

1
protected $_pagination = array(20, 50, 100, 300);

看到这边很多朋友可能已经知道下面如何修改这段代码了,对,就是在这个里面添加你需要的数字

1
protected $_pagination = array(20, 50, 100, 300,500,1000);
pagination select

分页数修改前

分页数修改后

分页数修改后


prestashop 站点搬迁

关于prestashop 1.5 站点搬迁或者上线需要下面几点调整:

1. 导出 数据库 sql语句, 导入到空间数据库,上传代码文件。

2. 修改配置信息 config/settings.inc.php

1
2
3
4
5
define('_DB_SERVER_', 'localhost');
define('_DB_NAME_', 'ps1540'); //数据库名称
define('_DB_USER_', 'root'); //数据库用户名
define('_DB_PASSWD_', ''); //数据库密码
define('_DB_PREFIX_', 'ps_'); // 数据库表前缀

3. 登录数据库 打开表 ps_configuration,查找到 下面两个配置项 PS_SHOP_DOMAIN ,PS_SHOP_DOMAIN_SSL. 修改这两个配置项的 value 为你的域名 例如 wwww.prestashopkey.com

4. 打开.htaccess 找到

1
RewriteCond %{HTTP_HOST} ^prestashopkey.com$

将 prestashopkey.com 修改为站点的域名

5. 修改 cache 文件夹读写权限,遍历到子目录 。

经过这五步后,你的站点搬迁就成功了。


prestashop 多站点信息查询系统

Prestashop 多站点信息查询系统,是一款为方便站群管理者而诞生的系统。 不用登陆多个系统后台,一个界面就可以看到所有注册用户信息 和访问信息,以及最关键的 订单信息。


PSIS v1.0 目前支持 prestashop 1.3.X,如需改进。在你的支持下我们也会升级支持更多版本  。


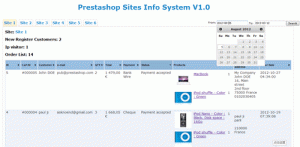
1. 查看各站点 注册用户数,访客数,订单信息以及订单中的产品信息,包括产品图片,链接到具体产品信息页面。

prestashop多站点信息查询

prestashop多站点信息查询


2.支持站点数据 N个 (N 趋向于正无穷)。

支持添加多站点

支持添加多站点


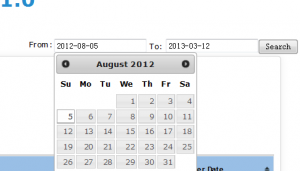
3. 支持按时间搜索订单 ,友好的 jquery 日期插件。

按日期搜索订单

按日期搜索订单


4. 支持订单信息的排序 ,方便订单筛选。

订单信息排序

订单信息排序


相信这个系统的出现,可以节约你的时间,加快订单处理效率。

Demo: PSIS v1.0


推荐几款免费的prestashop模板

1. Matrice theme Prestashop 1.3.1 – 1.4.X

just another template for Prestashop 1.3.1. As usual, simple clear and free!! also the installation is much easier thanks to your feedback

下载 1.3 ,1.4 Demo


2. Element theme prestashop

Element is fusion between « Minimaliste » and « Black&White » theme, based on 2 columns layout. the idea was to have a Shop with a clean up look

下载 Demo


3.Fennecs theme Prestashop

This template is a mini fashion and urban product store, based on 3 verticals layout. It’s a new reloaded version of Ipnotik template.

下载 Demo


4. Uppercase theme Prestashop

This template is just a concept store, to demonstrate how much Prestashop e-commerce CMS is flexible to make a clean up layout. Please to give your suggestions…

下载 Demo


5. Moon theme Prestashop

Moon template is another concept store for Prestashop CMS, with a simple and purified design. So feel free to use it as a basis in your future ecommerce project.

下载 Demo


6. Alysum PrestaShop 1.5模板[v1.3]

Alysum PrestaShop模板,支持PrestaShop 1.5,是一个购物模板 “Alysum” – is a great solution for small and medium businesses. Due to compact, modern and stylish design as well as “Theme settings module” embedded tool.

下载 Demo


Prestashop news bottom module

Prestashop news  bottom block这个模块在prestashop 页面右下角 添加一个弹出框,

弹出框可以支持多个tab定义网站的一些最新产品咨询, 最新的通知…;

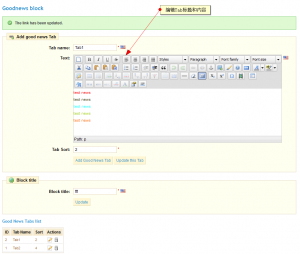
edit bottom tab

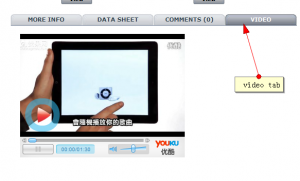
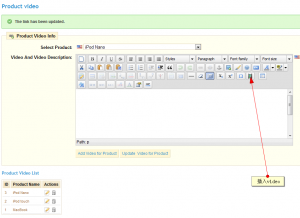
后台可编辑 tab内容,富文本编辑器支持 html文本 图片 视频

符合prestashop 1.4.7 模块标准,电击install即可使用

符合prestashop 1.4.7 模块标准,电击install即可使用


弹出框自动隐藏,点击展开;

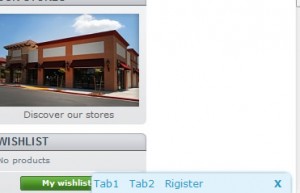
bottom news tab load

加载后tab内容隐藏,显示在右下角


支持多tab切换.

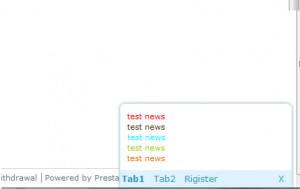
bottom news tab

支持 多tab切换

prestashop1.5 breadcrumb添加样式

之前在一个论坛里回复过这个问题,最近又有人咨询这个问题。我想想还是写下来分享给做模板的前端攻城师。

prestashop默认版本产品相关页 breadcrumb最后的节点是文本,没有任何html标签包裹。 加上标签后就可以写css样式修饰了。

1. 打开controllers/front/ProductController.php;
2. 查找到 protected function assignCategory() 大约在436行;
3.将代码 修改为;
protected function assignCategory()
{
// Assign category to the template
if ($this->category !== false && Validate::isLoadedObject($this->category))
{
$this->context->smarty->assign(array(
‘path’ => Tools::getPath($this->category->id, ‘<span  “nav_last”>’.$this->product->name.'</span>’, true),
‘category’ => $this->category,
‘subCategories’ => $this->category->getSubCategories($this->context->language->id, true),
‘id_category_current’ => (int)$this->category->id,
‘id_category_parent’ => (int)$this->category->id_parent,
‘return_category_name’ => Tools::safeOutput($this->category->name)
));
}
else
$this->context->smarty->assign(‘path’, Tools::getPath((int)$this->product->id_category_default, ‘<span class=”nav_last”>’.$this->product->name.'</span>’));

$this->context->smarty->assign(‘categories’, Category::getHomeCategories($this->context->language->id));
$this->context->smarty->assign(array(‘HOOK_PRODUCT_FOOTER’ => Hook::exec(‘displayFooterProduct’, array(‘product’ => $this->product, ‘category’ => $this->category))));
}
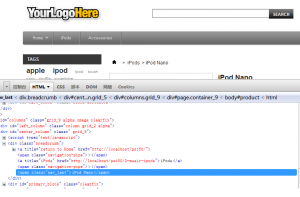
产品页面breadcrumb 最后一个节点添加span标签
产品页面breadcrumb 最后一个节点添加span标签